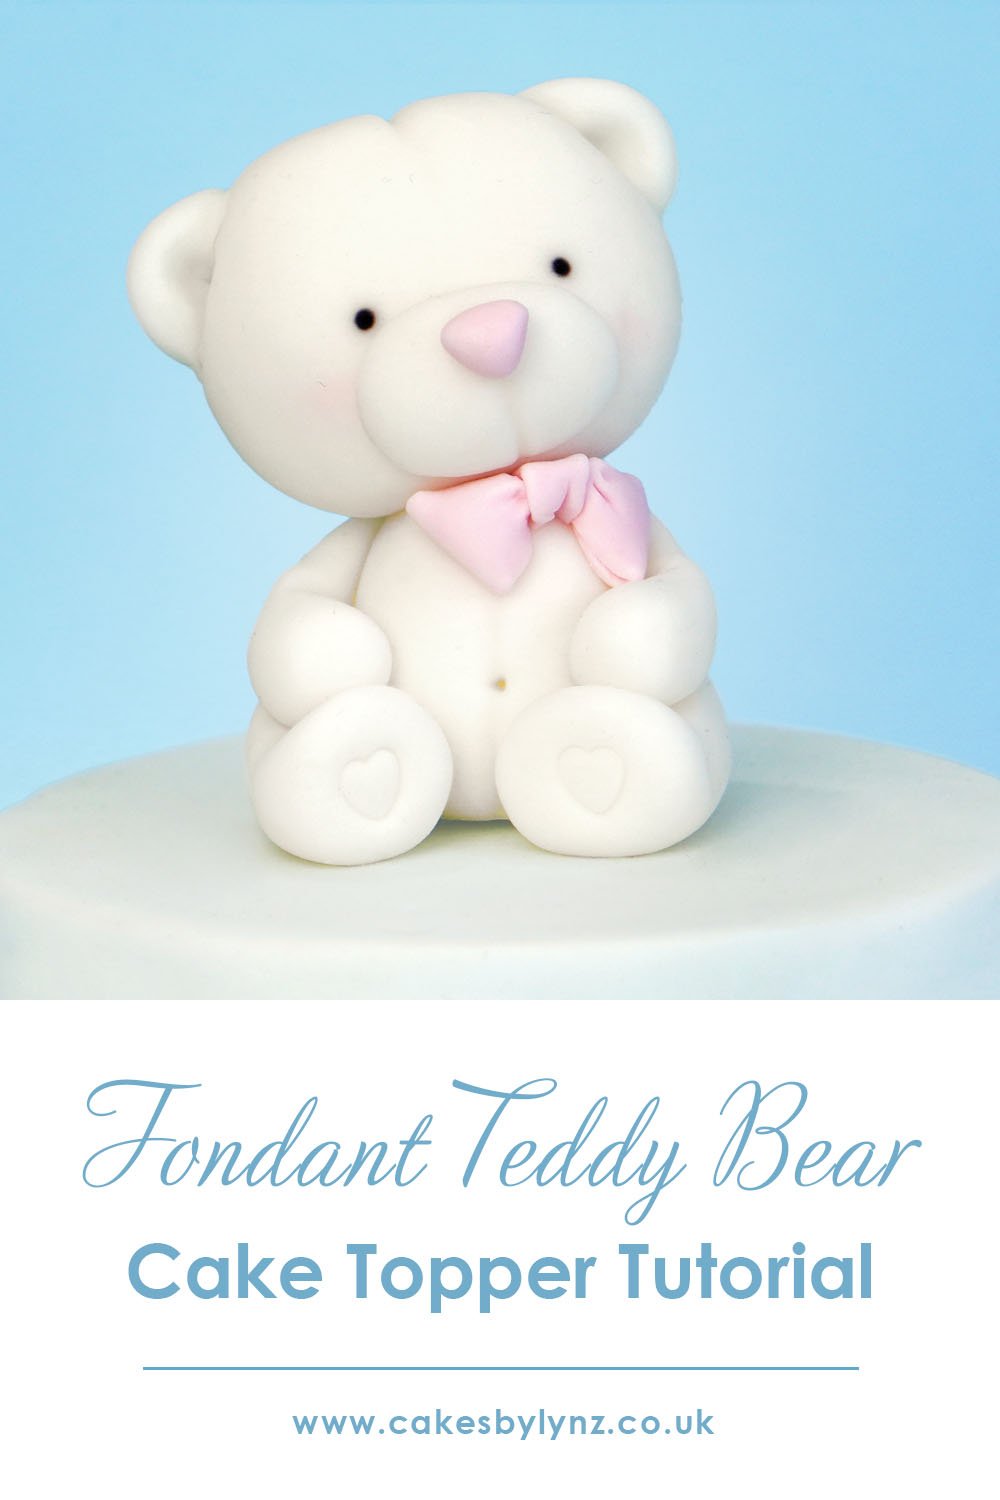
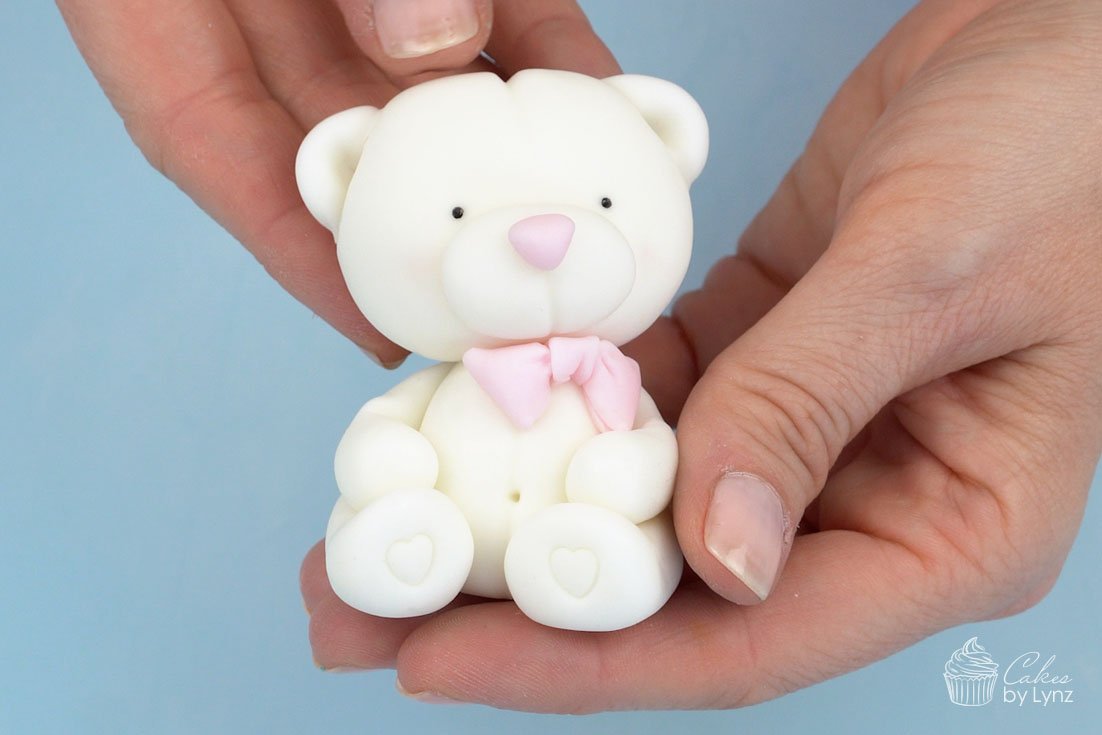
I recently made a cake to celebrate Saracino’s new Pasta Cover coloured fondant and I added a cute little fondant bear to the cake. I really wanted to share with you how you could make a little teddy bear cake topper too.
This little teddy finished off my cake perfectly. I mean, is there anything cuter than a cake with a teddy bear. Below you’ll find a video tutorial to guide you though all the steps of making this little fondant topper.

Watch how to make this fondant teddy bear cake topper
Below you’ll find the full step by step video tutorial showing how to make a teddy bear cake topper out of fondant. Watch as I show you just how easy he is to make.
What fondant to use
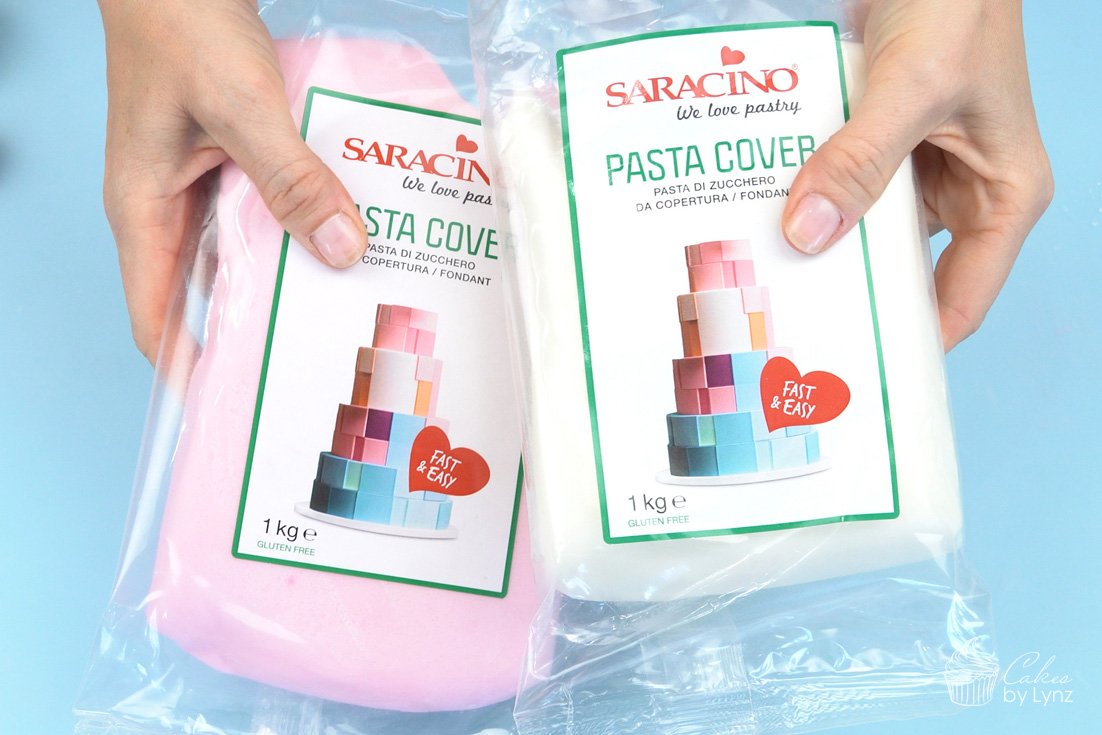
For this topper I used Saracino’s Pasta Cover coloured fondant. The finished topper measured around 7cm in height, which meant for the size fondant was perfect. I didn’t need to add anything to the fondant and it firmed up enough that the head didn’t squish the body.
Leaving the fondant for a few hours to firm up before gluing the head on allowed enough time for the body to keep it’s shape. I have to say this fondant blended so well and was soft, but at the same time kept it’s shape.
If you were making a larger topper or you didn’t have as much time you could use the Saracino Pasta Model which you may have seen me use before as this firms up a lot faster.
- Saracino Pasta Cover White – Use code CAKESBYLYNZ10 for 10% off
- Saracino Pasta Cover Pink – Use code CAKESBYLYNZ10 for 10% off
- Saracino Pasta Model – Use code CAKESBYLYNZ10 for 10% off
How to make a teddy bear topper
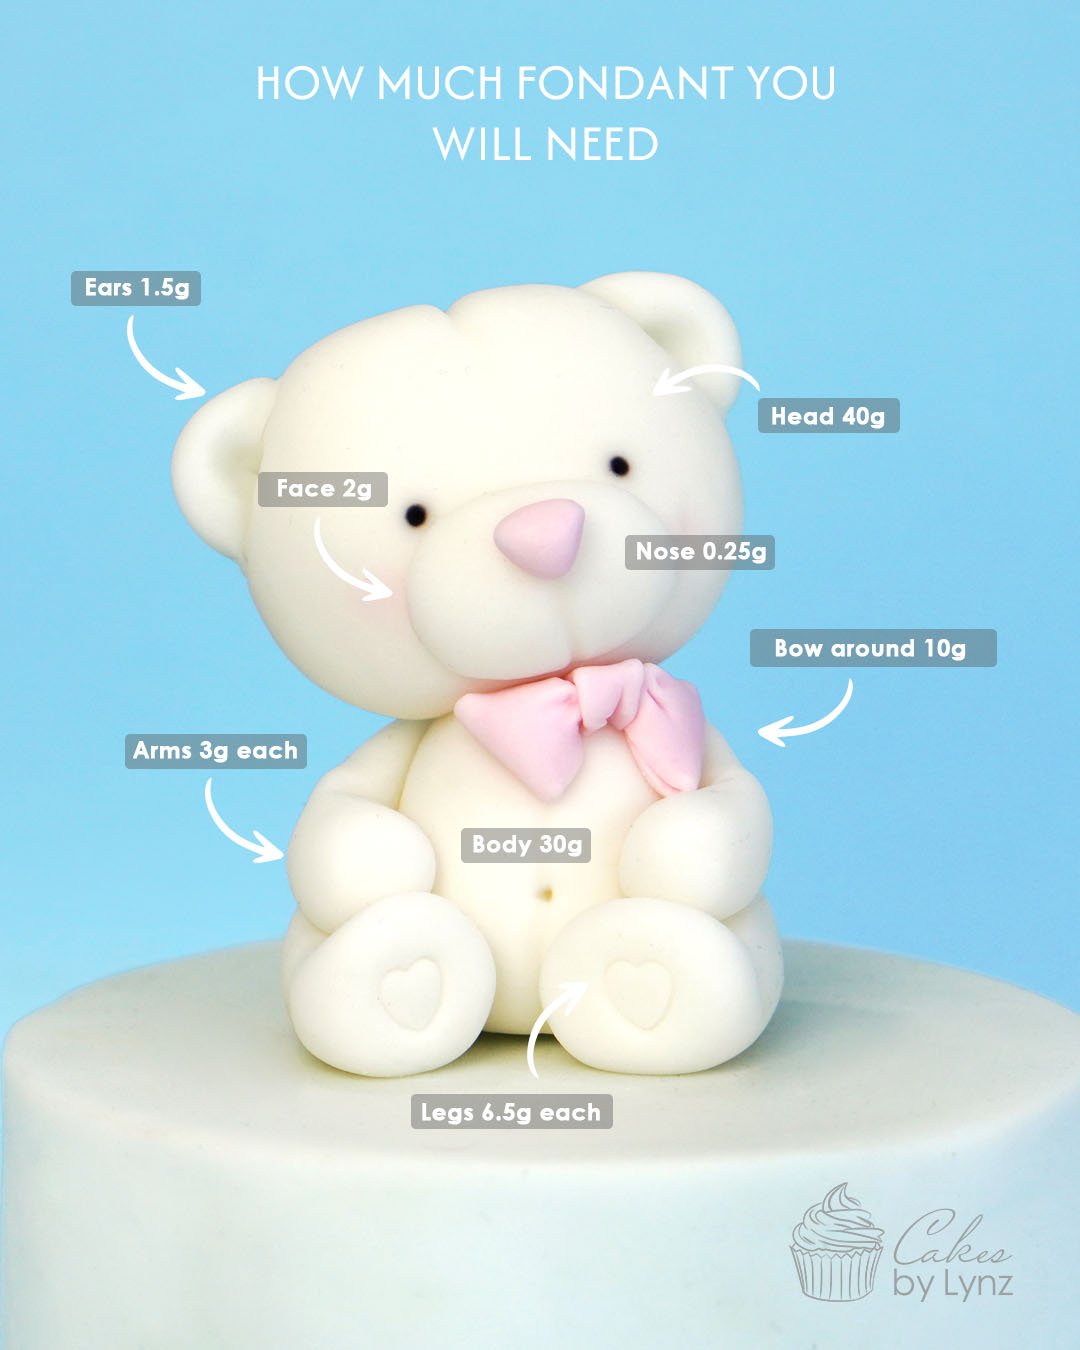
The teddy bear is super easy to make and becomes a lot easier when its broken down into 3 parts: the head, the body and the bow.
Making the head
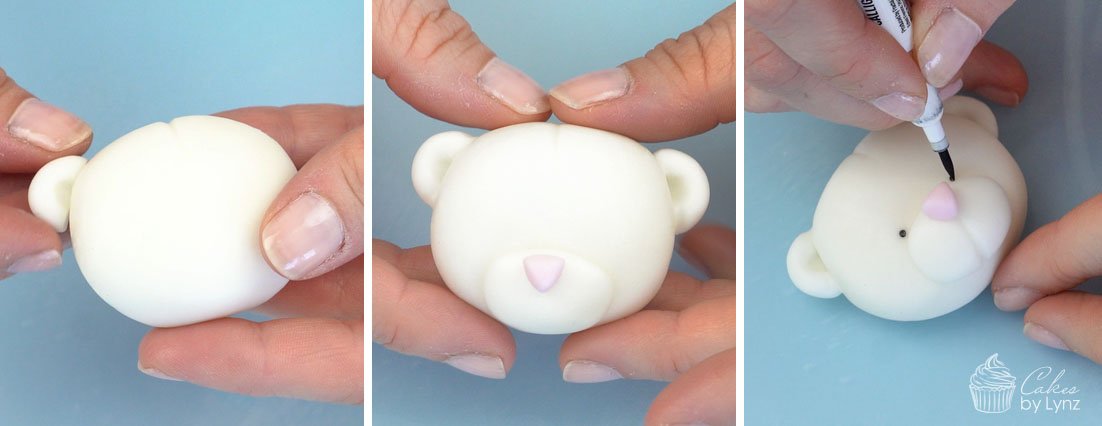
- Step 1: Roll the 40g ball of fondant into a smooth ball and push it into an oval shape. Take your dresden tool and add a small line at the top, coming slightly onto the forehead.
- Step 2: Roll the fondant for your ears into a flat oval shape and cut directly in half. Use the wider end of your dresden tool and push in to create a small dent for the inside of the ear. Then add onto the side of the head with some edible glue. Use your drenden tool to smooth the fondant at the join and make sure they are connected.
- Step 3: To make his facial featured, flatten a 2g ball of fondant into an oval and pinch the edges to make it raised in the middle. Gluing this to the bottom of his face. To this you want to add a triangle shape piece of pink fondant for his nose and add a small line below his nose.
- Step 4: Finish his face with some tiny eyes. I have used an edible black pen, but you could also add some tiny fondant balls. Lastly I added some dusky pink tint onto the sides to create some rosy cheeks.
Making the body
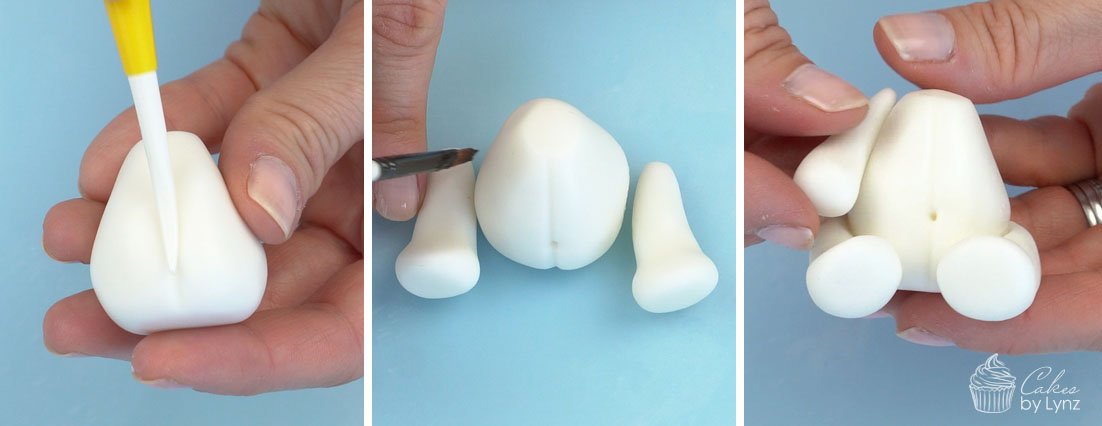
- Step 5: Roll 30g of fondant into a ball and taper it down on one side to create a tear drop shape. Flatten this on the bottom and push in slightly on the top, so there is somewhere to connect the head.
- Step 6: Draw a line along his body with your dresden tool and I added a tiny hole for a belly button.
- Step 7: To make his arms and legs you want to roll your fondant so its wider at one end. For his legs push on the bulbus end to create his little foot. Add these onto his body with some edible glue and run your drensden look along where they touch the body to join the fondant.
You can use your dresen tool to add some creases for the bend in his arm. - Step 8: Before I let the body firm up I added a small 2 inch bamboo squewer so I would be able to connect his head with a little edible glue.
In the tutorial above watch as I also show you how to make the cute little bow.
Tools I used for the Cake
- Saracino Pasta Cover White – Use code CAKESBYLYNZ10 for 10% off
- Saracino Pasta Cover Pink – Use code CAKESBYLYNZ10 for 10% off
- Saracino Pasta Model – Use code CAKESBYLYNZ10 for 10% off
- Fractal Colours Black Edible Pen
- Modelling tools
- Sugarflair Dusky pink edible tint
~ Please note that some of the links above are affiliate links. If you click the link and purchase any item through that link, I will receive a small commission from the website but this does NOT add any additional costs to you. Thank you so much for supporting this blog x ~
I really loved creating this cute little topper. I created him in white, but you could make him in any colour to match your theme. Plus if you didn’t want to add a bow, what about a little party hat! If you would like to see more cake toppers and you haven’t already don’t forget you can subscribe to my YouTube channel for more FREE cake decorating tutorials.
Next time I’ll be showing you how to make the rest of this cake, so please come and take a look soon!
Why not save this tutorial for later and pin it to Pinterest