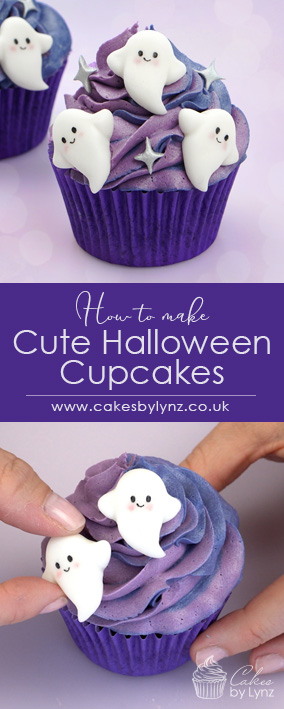
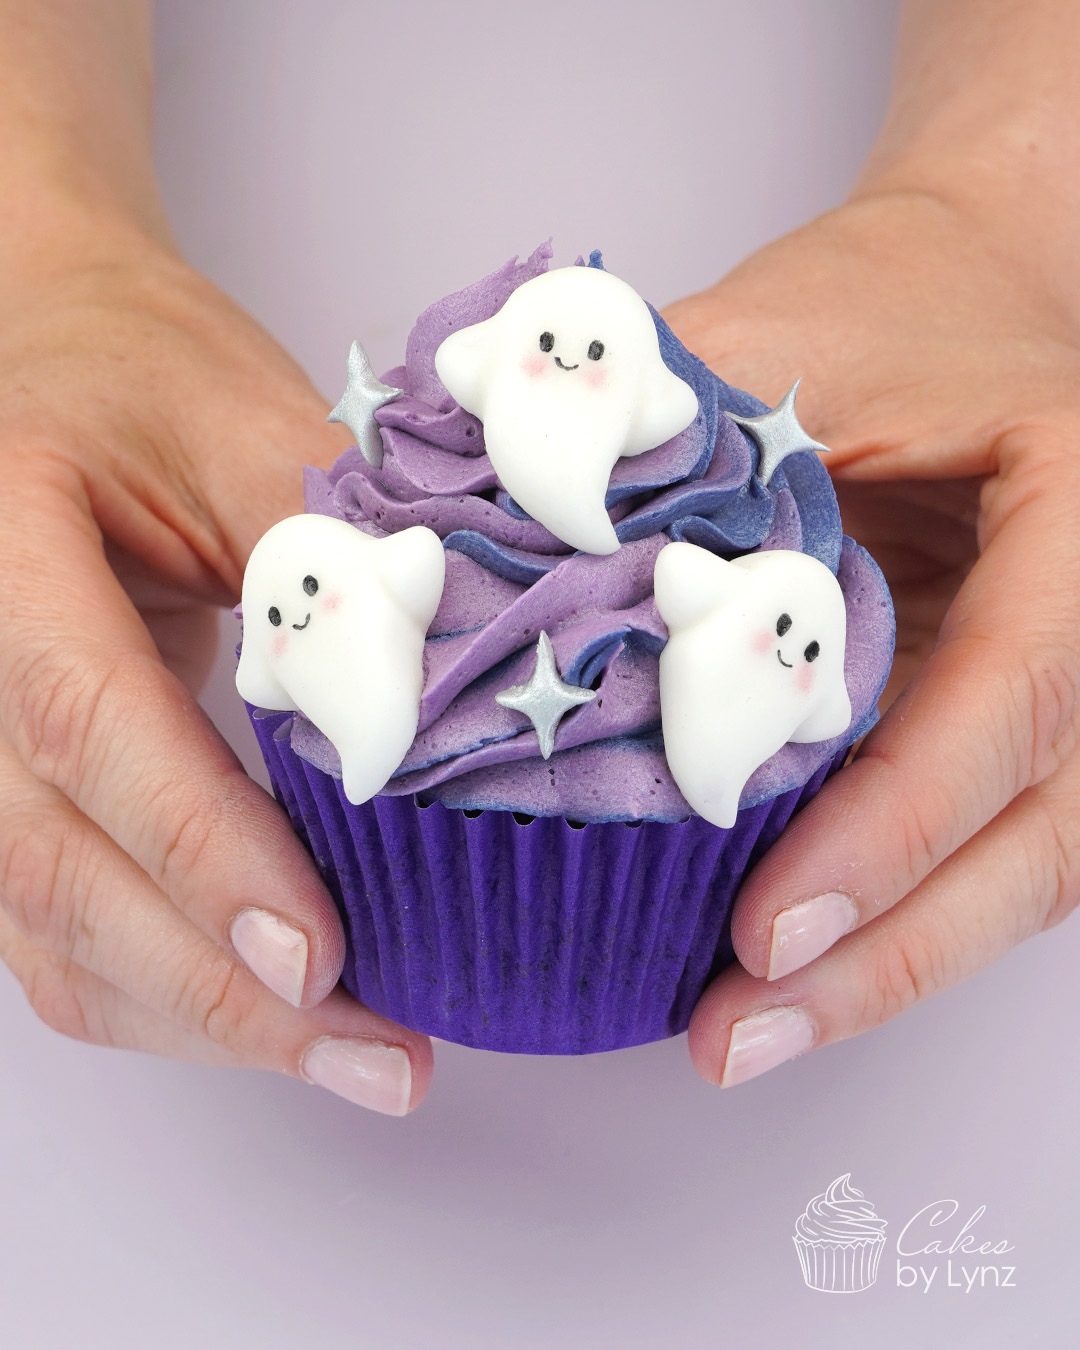
I wanted to create a Halloween cupcake that was more cute than scary, and these ghost cupcakes were the perfect answer! They were so much fun to make and surprisingly simple.
They require no moulds and very little tools, so are perfect for anyone looking to create something adorable this Halloween. This also makes them perfect to make with the kids too!

Watch how to make cute Halloween ghost cupcakes
Below you’ll find the full step by step video tutorial. Watch as I guide you through every stage of how to make these cute ghost toppers, how to make the little shimmery stars and how to pipe this pretty ruffle cupcake using a two-tone effect.
Tools you will need
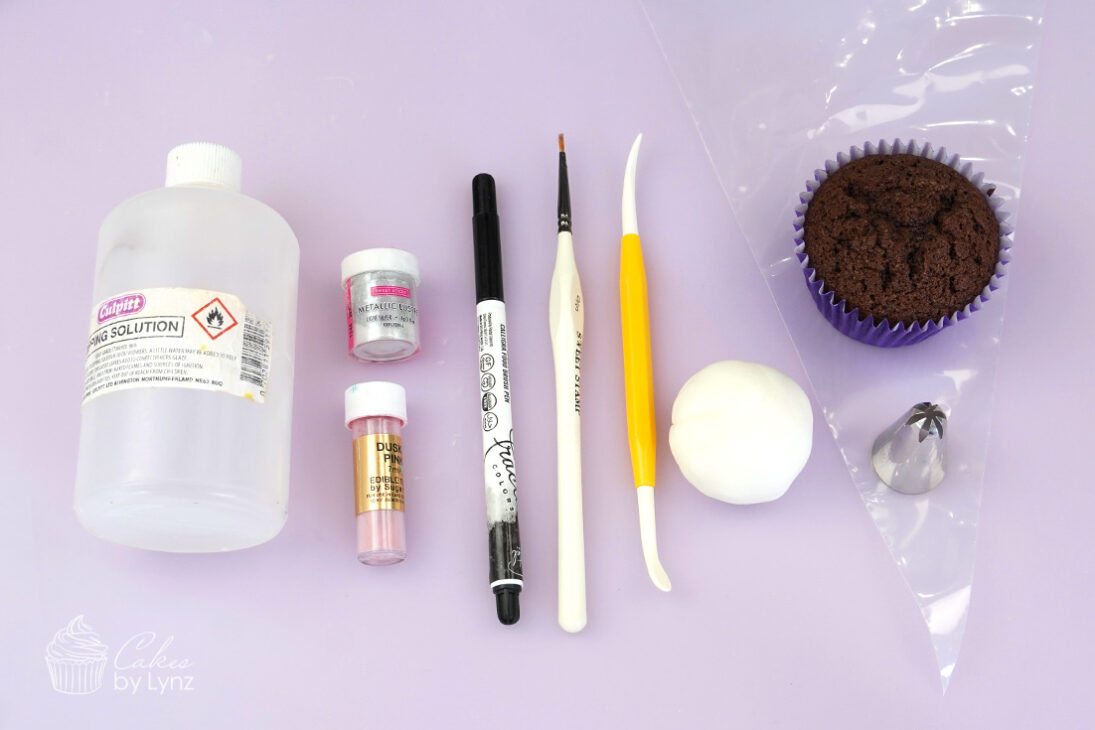
- Cupcakes (I’m using my chocolate cupcake recipe)
- American Buttercream (Get my American Buttercream recipe here)
- Fondant – White
- Fractal Colours edible pen (10% off code ‘Lynz10’)
- 3 inch round cookie cutter
- Modelling tools
- Sugarflair Dusky pink edible tint
- Sweet Sticks Metallic Lustre Dust (15% off code ‘CAKESBYLYNZ15’)
- Colour Splash Gel Colours
- Piping Bags
- 2D piping nozzle
- Dipping solution
- Paint Brush
~ Please note that some of the links above are affiliate links. If you click the link and purchase any item through that link, I will receive a small commission from the website but this does NOT add any additional costs to you. Thank you so much for supporting this blog x ~
Making the ghost cupcake toppers
These require a small ball of white fondant weighing around 4.5 grams. This will make a ghost 3cm in length, meaning you have space for lots of ghosts on your cupcakes. You could also add these onto your cakes too.
- Starting with a teardrop shape, pull out his little arms and use your fingers to shape the ghost, pulling the bottom round into a point.
- Add in some small lines with a Dresden tool to define the arms and body.
- Then all that’s left to do is add his little face with an edible pen. First adding 2 ovals for eyes and a tiny little smile. Finish with some dusky pink edible tint for cheeks. You could even experiment with different facial expressions!
Top Tip: If you don’t have an edible pen you can use a small paintbrush with some black food gel.

Piping the perfect two-tone buttercream
Now what cupcake is complete without the perfect buttercream swirl. Let me show you how I created this two-tone buttercream effect to compliment these purple cupcake cases.
For the buttercream I’m using my American buttercream recipe which I coloured in a lovely purple and blue.
- First you want to add your buttercream into your piping bag with the 2 colours separated on each side. Here I’ve got my piping bag over a tall glass to keep it open and I am using the 2D piping nozzle.
If you wanted to use more than 2 colours make sure you check out my rainbow buttercream tutorial as any more than 2 and it becomes too fiddly and they start to mix. - Take your piping bag and holding it directly above your cupcake. Start from the outside edge bringing the piping bag around, applying a small amount of pressure. As you complete one rotation bring the nozzle in slightly and continue until you have this pretty ruffled dome of buttercream.

Your cupcake is then ready for you to add all your cute ghosts and stars. I think these ghosts would look amazing on a Halloween cake too! What do you think?
I really loved creating these cupcakes and filming the tutorial and I really hope you enjoy it too. These cupcakes are so much fun to make and I love how excited they have made me for more Halloween creations. If you decide to make some yourself please do let me know. Plus if you haven’t already don’t forget you can subscribe to my YouTube channel for more FREE cake decorating tutorials.
Why not save this tutorial for later and pin it to Pinterest