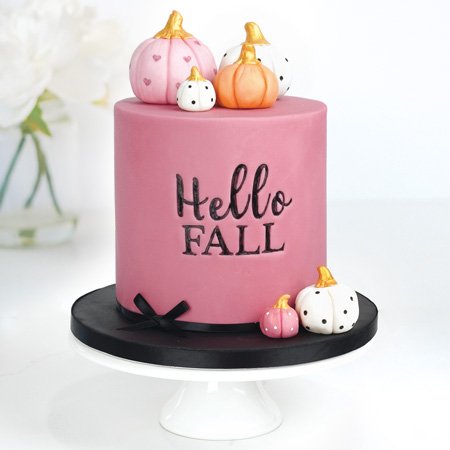
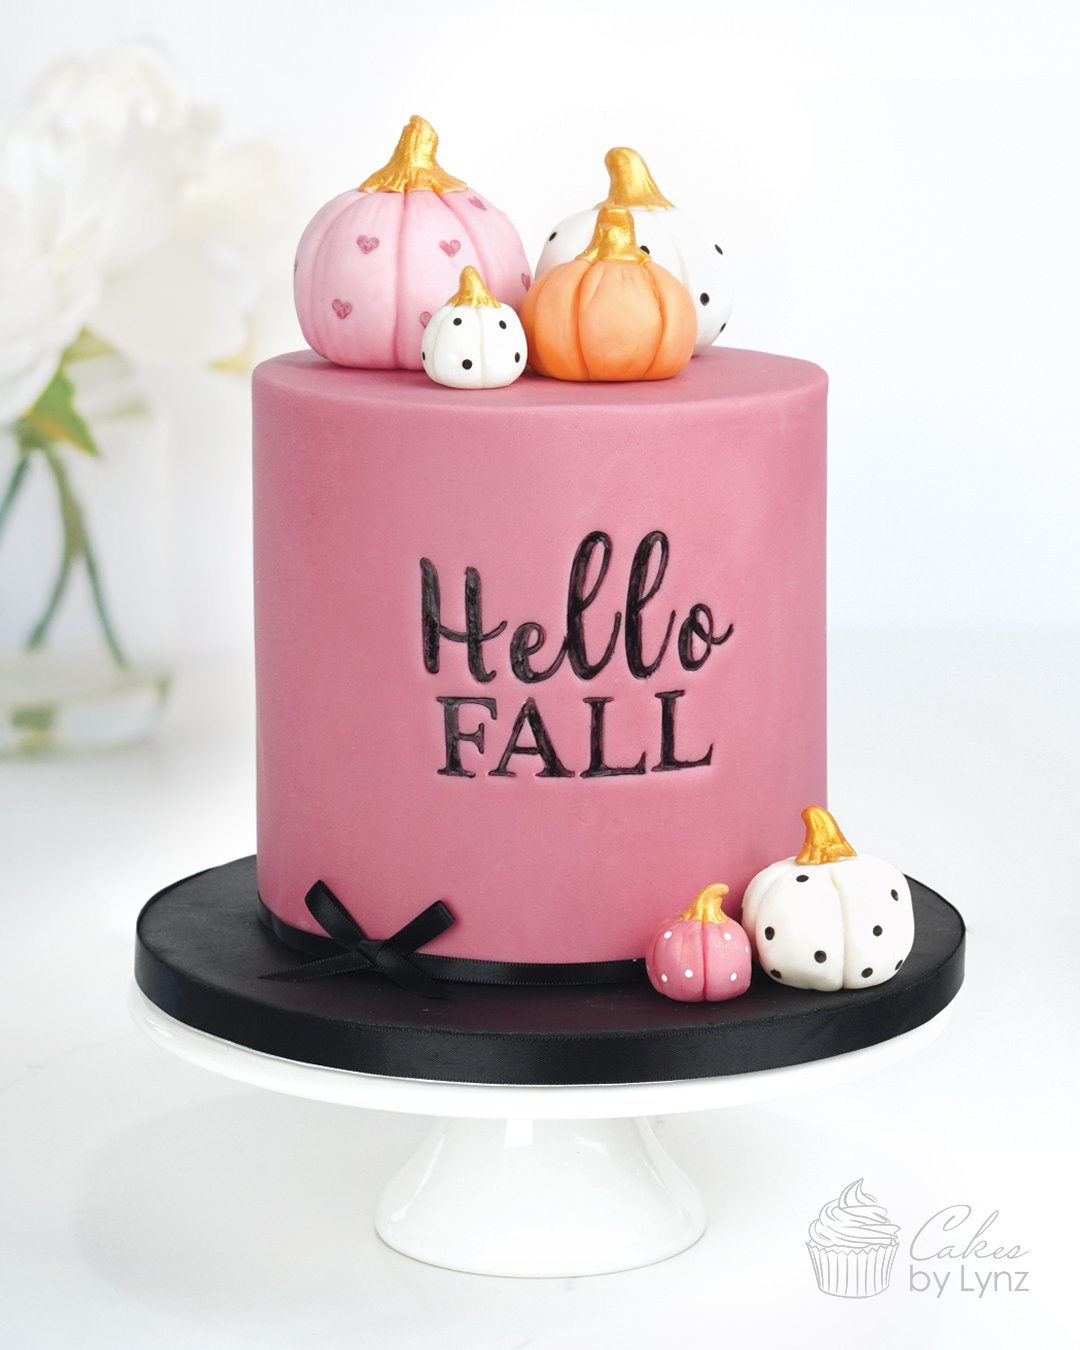
Cosy season is here, so to celebrate this week I wanted to create a Fall / Autumn inspired cake tutorial for you. Now what represents Fall better than a pile of pumpkins? So I’ll show you how to create these cute pumpkin cake toppers that look like they’ve been hand painted with pretty pastel shade, polka dots and gold stems.
I also wanted to share with you my favourite way to add personalised lettering on to the front of your cakes with the Sweet Stamp letter sets. These are perfect for a message like ‘Hello Fall’, but you could also add names, happy birthday or little messages too.
Watch how to make this Fall inspired pumpkin cake
Below you’ll find the full step by step video tutorial. Watch as I show you the easiest way to add personalised lettering onto your cakes and how to make these cute pumpkin cake toppers, which are perfect for any Fall cake.
Adding personalised text to your cakes
There is no better way to make a cake feel personal than by adding custom lettering. On this cake I have added ‘Hello Fall’ but you could add a name, happy birthday, numbers or anything that ties the cake to the person receiving it.
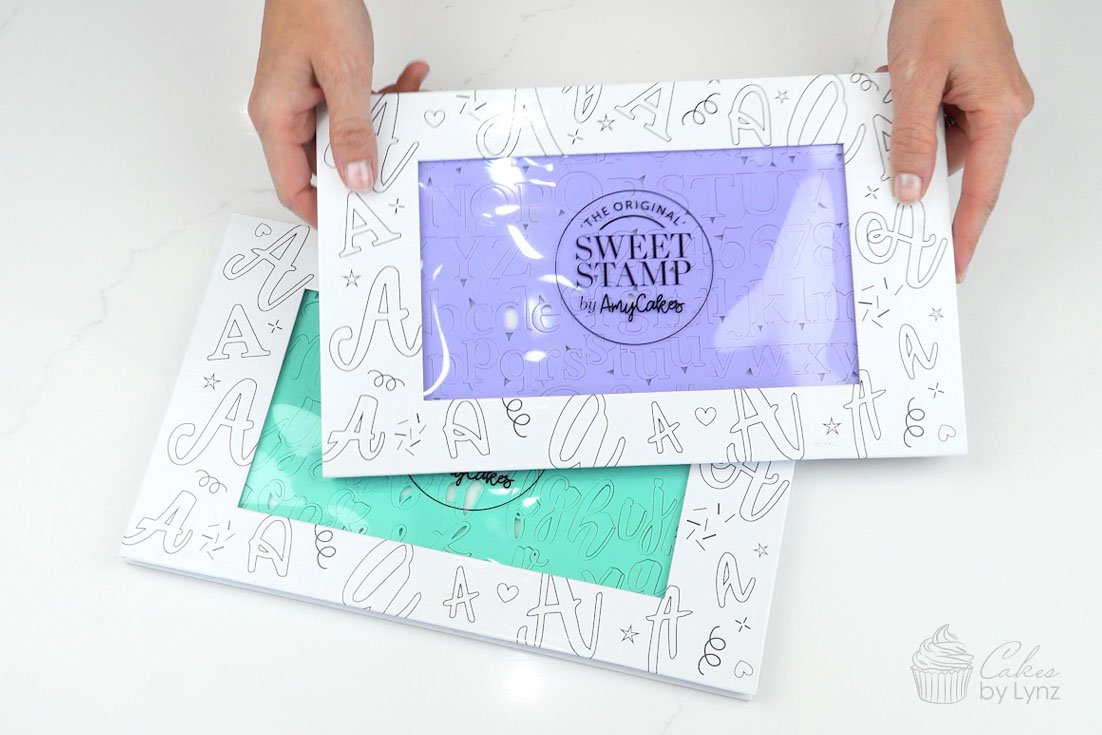
One of my favourite ways to add letting onto my cakes is to use the Sweet Stamp letter sets. These come in so many different styles, so there is one for any theme. For this cake I’m using the Handwritten set and the Classic set. These are 2 of my favourites. The Handwritten set was actually the first set I got and I still love using it.
How to use the Sweet Stamp Letter Sets
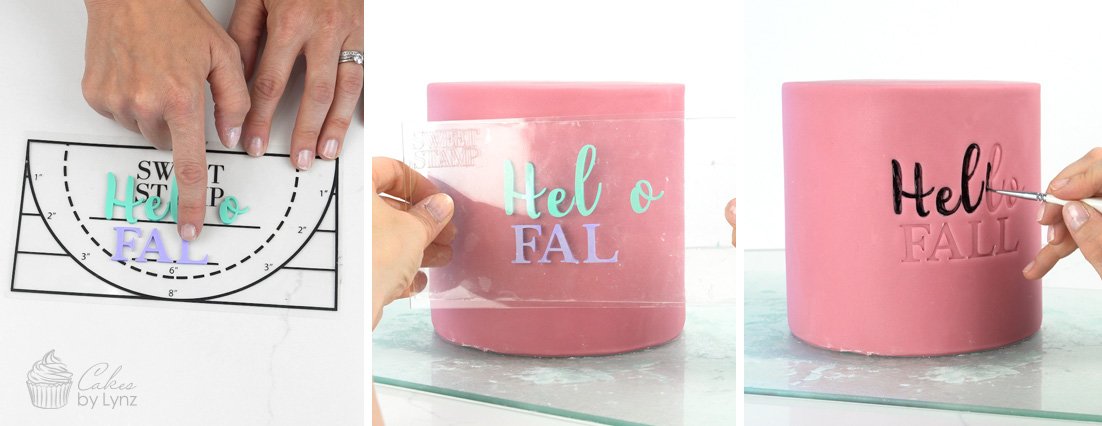
If you haven’t seen the Sweet Stamp letter sets before you just lay out your letters and using the pickup pad you create your own custom stamp to push into your fondant. You then take a small paint brush and some edible paint and paint inside the embossed message.
TOP TIP When using your stamp you want to make sure your fondant is still soft. I like to do this straight after covering my cake as the letters push in so easily. I also like to push my letters in just enough that you can read the words. If you push in too deep it can be a little fiddly.
I love using these letter sets and below are all the tools I used to create my personalised message. You’ll also find the full list of tools for this cake at the bottom of this post.
- Sweet Stamp Handwritten Letter Set – Use code CAKESBYLYNZ for 10% off
- Sweet Stamp Classic Letter Set – Use code CAKESBYLYNZ for 10% off
- Pickup Pad – Use code CAKESBYLYNZ for 10% off
- Paint Brushes – Use code CAKESBYLYNZ for 10% off
How to make pumpkin cake toppers
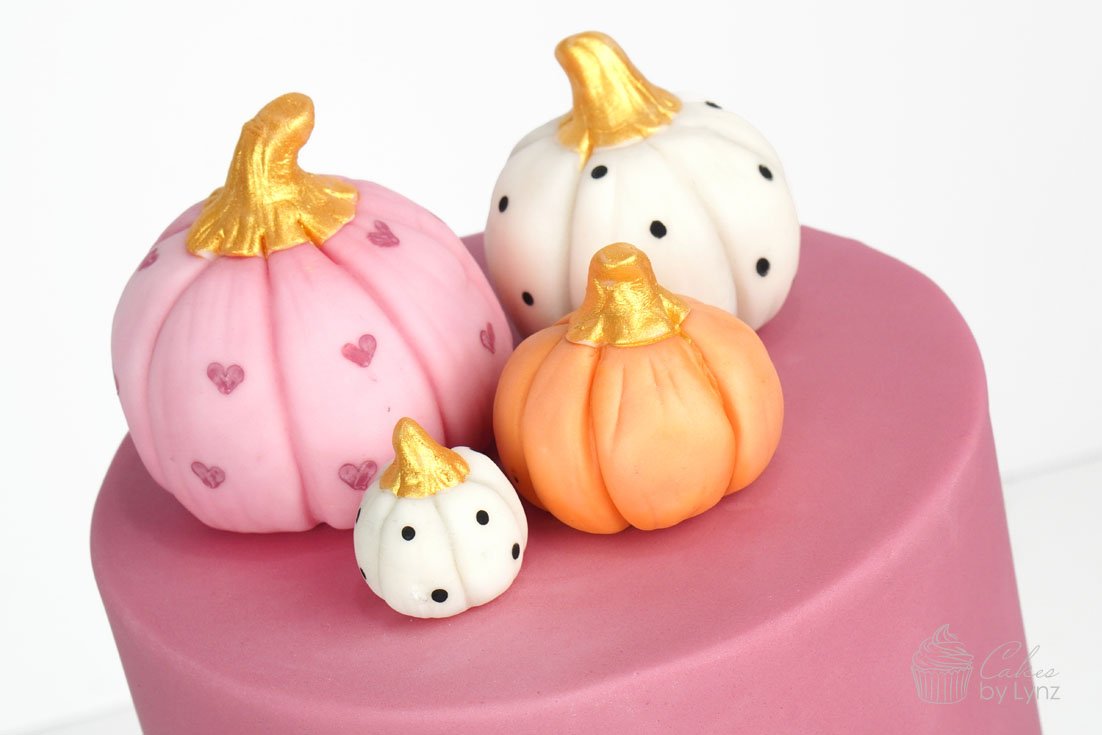
What Fall inspired cake would be complete without some pumpkins, but these are not just any pumpkins, these are Pinterest worthy, pastel pumpkins with polka dots, hearts and gold stalks.
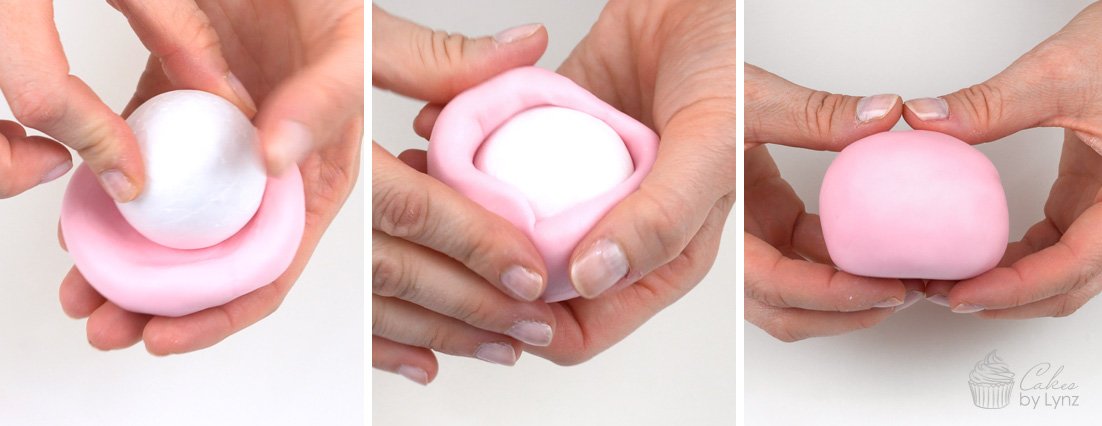
To make these pumpkins I’m adding some polystyrene balls inside. Large balls of fondant on top of your cake can add quite a lot weight, so the polystyrene balls make them a lot lighter. If you wanted them to be fully edible you could use Rice Krispie treats rolled into a ball or a cake top mixture inside.
- Step 1: To make the pumpkins start by creating a dish shape with your fondant. Paint on a little edible glue and place your ball inside. You then want to work the fondant over your ball, closing it up at the top.
- Step 2: Roll your fondant covered ball in the palm of your hand to get out any marks and push on the top to squish the ball slightly making it slightly wider and more of a pumpkin shape.
- Step 3: You can then use your dresden tool to create evenly spaced lines running around your pumpkin. To add some texture add some additional small lines to the top and bottom.
- Step 4: To bring the pumpkins to life I like to add a little colour along the lines and also around the base. Choose an edible tint slightly darker than your fondant colour. If you find your edible tint a little too dark you can mix in a little cornflour to soften it.
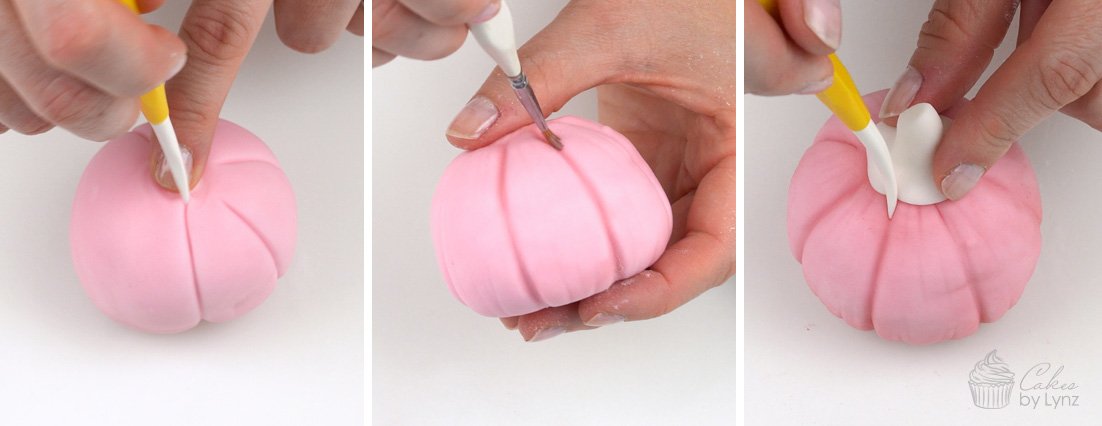
- Step 5: Next you want to add a stalk. Take a small ball of fondant and taper down one side. Use your fingers to feather out the wider end (a bit like the trim of a hat) and cut it down at an angle.
- Step 6: Place this onto your pumpkin and using your drenden tool run up the lines you previously created to join it to the pumpkin and then add some texture lines.
- Step 7: This can then be painted gold with an edible gold paint. I used a Pure Gold lustre dust by Sweet Sticks and mixed this with a little dipping solution. This is a great way to make a paint, but you can also read my Top 6 easy ways to make edible paint here.
- Step 8: Your pumpkins are then ready to decorate in your chosen pattern. Watch how I add polka dots and little hearts in the video above.
Tools I used for the Cake
- Sweet Stamp Handwritten Letter Set – Use code CAKESBYLYNZ for 10% off
- Sweet Stamp Classic Letter Set – Use code CAKESBYLYNZ for 10% off
- Pickup Pad – Use code CAKESBYLYNZ for 10% off
- Paint Brushes – Use code CAKESBYLYNZ for 10% off
- Sweet Stamp Texture Tools – Use code CAKESBYLYNZ for 10% off
- Fondant – White
- Modelling tools
- Sugarflair Dusky pink edible tint
- Sweet Sticks Metallic Lustre Dust -Use code CAKESBYLYNZ15 for 15% off
- Black Edibles Art Paint
- Dipping solution
- Polystyrene balls
- Paddle Smoother
Plus find all my favourite tools and baking equipment on Amazon
~ Please note that some of the links above are affiliate links. If you click the link and purchase any item through that link, I will receive a small commission from the website but this does NOT add any additional costs to you. Thank you so much for supporting this blog x ~
I really loved creating this Fall inspired cake and I hope you can use some of the techniques in your own cake decorating. If you haven’t already don’t forget you can subscribe to my YouTube channel for more FREE cake decorating tutorials.
Plus why not save this tutorial for later and pin it to Pinterest